Roof Leak Warning Signs Every Homeowner Should Check After Rain
What if the first sign of a roof leak isn’t water dripping from the ceiling?
After heavy rain, a home may reveal subtle moisture clues before an active drip, major stain, sagging ceiling, or widespread material damage appears. Similar symptoms can also come from plumbing, condensation, HVAC drainage, windows, or other moisture sources, so treat them as reasons to investigate rather than proof of a particular roof defect.
Knowing what to check safely after a storm can help homeowners document damage, identify areas needing professional evaluation, and limit the extent of moisture-related damage.
Here are the roof leak warning signs to check once the rain stops and conditions are safe.
What Roof Leak Warning Signs Mean After Heavy Rain
Post-rain stains, damp materials, peeling or buckling paint, and musty odors are recognized moisture warning signs in the University of Georgia Cooperative Extension’s moisture inspection checklist. They may indicate roof leakage, but other moisture sources should also be ruled out. The EPA’s moisture-control guidance explains that rainwater can seep, wick, or move along concealed building layers before becoming visible, so the stain may not be directly below the entry point.
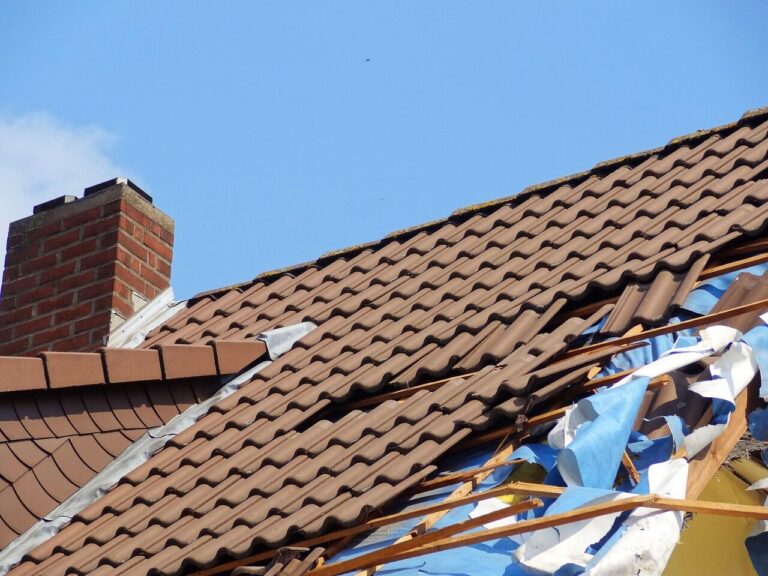
A small brown stain could be associated with damaged or missing shingles, flashing around a chimney or skylight, a roof penetration, or drainage problems. These are reasonable areas to evaluate under UGA’s home maintenance guidance, but the stain alone cannot diagnose the defect. If it grows or returns after rain, arrange an appropriate assessment. Before authorizing work, review how to find and compare reliable home repair services.
- Ceiling stains: may indicate current or previous moisture intrusion, although the source may be elsewhere.
- Dripping water: indicates active moisture and requires prompt attention, especially if electrical equipment or a sagging ceiling is involved.
- Musty odors: can suggest damp materials or microbial growth, but an odor does not confirm hidden mold or identify the moisture source.
Insurance Institute for Business & Home Safety research shows that wind-driven rain can expose openings that remain dry during calm rainfall. Possible entry areas include damaged roof-cover sections, sheathing joints, and attic vents.
A flashlight is useful in safely accessible areas. A generic moisture meter can help identify comparatively damp materials and monitor drying, but it does not confirm where a leak began. Readings vary with the material, calibration, meter type, and operator technique. Infrared cameras display surface-temperature differences rather than water itself, so results require trained interpretation and confirmation with visual observations or moisture measurements. The limitations of both tools are discussed in these building diagnostic test protocols.
Do not perform rooftop testing or repairs if the surface is wet, access is uncertain, or the task is outside your ability. This guide to deciding when a home repair is too risky for DIY work provides additional considerations.
Photograph and date visible damage before cleanup when possible, and retain receipts and repair records. If an insurance claim may be involved, notify the insurer promptly and ask about required procedures before permanent repairs. As the National Association of Insurance Commissioners’ consumer guide explains, coverage is not automatic and depends on the cause, exclusions, deductible, roof condition, and policy settlement terms.
How to Inspect Ceilings, Attics, Gutters, and Roof Edges for Water Damage
Address immediate hazards before inspecting:
- Electrical hazards: If water has reached a light, outlet, wiring, or other electrical equipment, avoid touching the water or equipment. Turn off power only from a dry, safely accessible location; otherwise contact an electrician. If there are sparks, a burning odor, or fire, leave the area and contact emergency services. See the CDC’s electrical hazard guidance.
- Sagging ceilings: Keep people and pets away from a substantially bowed or saturated ceiling. Do not press, puncture, or stand beneath it; request urgent professional evaluation. The CDC Healthy Housing Inspection Manual discusses structural and moisture hazards associated with damaged ceilings.
- Wet roofs: Never climb onto a wet roof. Inspect exterior surfaces from the ground or another secure location and leave rooftop inspection to appropriately equipped professionals. Damp roof surfaces increase fall risk, as reflected in OSHA fall-prevention guidance.
Once conditions are safe, start indoors. Look for ceiling stains, bubbling paint, soft or distorted drywall, or a musty odor near light fixtures, roof intersections, and exterior walls. Do not press on a wet or sagging area. A brown ring shows that moisture was present, but it does not reveal the route the water followed.
Enter an attic only if access, lighting, and footing are safe. Use an installed walkway where available. Otherwise, step only on clearly visible joists or truss chords—not insulation or ceiling drywall—and watch for exposed roofing nails. Stop if structural members are hidden, footing is uncertain, or access requires balancing. Additional precautions appear in ENERGY STAR’s attic inspection guidance.
In an accessible attic, use a flashlight to inspect the underside of roof decking, rafters, insulation, and areas around vents, chimneys, skylights, and plumbing penetrations. Damp insulation warrants investigation and may provide less thermal resistance, although the effect varies by insulation type and how wet it becomes. ENERGY STAR recommends professional help for wet insulation, deteriorated framing, mold, and difficult attic access.
- Decking and framing: Look for fresh drip marks, water trails, rusted fasteners, discoloration, or suspected mold growth. Appearance alone does not identify a mold species or establish the cause.
- Roof penetrations: Check safely visible areas around vents, chimneys, skylights, and plumbing boots for moisture or staining.
- Insulation: Look for darkened, compressed, displaced, or visibly damp sections without disturbing potentially contaminated material.
- Gutters: From a safe location, look for debris, overflow marks, standing water, accumulated shingle granules, loose fasteners, or sagging sections. These observations do not by themselves prove a leak.
- Roof edges: View fascia boards and soffits from the ground for peeling paint, swollen material, open joints, or staining.
A clogged gutter does not invariably force water beneath shingles. However, poor drainage can contribute to overflow and damage at roof edges, fascia, walls, or foundations. Whether water enters the roof assembly depends on the edge construction, flashing, wind conditions, and—in cold climates—ice-dam conditions.
Document findings with photos and dates. If active moisture is present, do not simply paint over the stain or conceal the area before the source is identified. For roof work, seek a qualified and insured roofing contractor and verify any state or local licensing requirements. The Federal Trade Commission recommends checking licensing and insurance, obtaining multiple written estimates, and using a written contract. Depending on the suspected source, an electrician, plumber, HVAC technician, or water-damage professional may also be appropriate.
Common Post-Rain Roof Leak Mistakes That Let Small Problems Spread
One common mistake is checking only the ceiling stain and assuming the roof entry point is directly above it. Water may have entered near a vent, chimney, flashing joint, or pipe boot and then moved along framing, insulation, or other concealed layers.
Another mistake is painting over a stain before controlling the moisture source and confirming that affected materials are dry. A moisture meter may help compare damp areas, but it should be used with an understanding of its limitations. The EPA recommends drying water-damaged materials within 24–48 hours when feasible to help reduce mold growth. That timeframe is a prevention goal, not a guarantee that mold starts at a precise hour.
- Delaying investigation because dripping stopped when the rain ended.
- Treating roof sealant as a diagnosis or permanent repair for failed flashing, shingles, or underlayment.
- Failing to photograph damage and retain receipts when an insurance claim may be involved.
A temporary patch may help limit additional water entry when it can be installed safely and is suitable for the affected component. It does not identify the underlying cause and should not be represented as a permanent repair unless it is an approved repair for that component. If a claim may be filed, document the damage and ask the insurer about procedures before permanent work, as advised in the Texas Department of Insurance disaster-claims guidance.
Waiting for another storm can allow unresolved moisture to affect more insulation, drywall, framing, finishes, or electrical equipment. If stains, odors, drips, or attic dampness recur after rain, arrange diagnosis by the professional appropriate to the suspected source rather than assuming the roof is the only possibility.
What to Do When Roof Leak Warning Signs Appear
An unresolved moisture source requires attention, but safety comes before inspection or cleanup. After heavy rain, use this sequence:
- Check for electrical, ceiling-collapse, and structural hazards.
- Photograph and date visible damage before cleanup when it is safe to do so.
- Inspect ceilings, walls, and safely accessible attic areas; view the roof, gutters, and roof edges from the ground.
- Limit additional water exposure only when this can be done safely, such as moving belongings away from a stable drip. Leave exterior roof measures to appropriately equipped people.
- Contact the insurer promptly if a claim may be involved, ask about required procedures, and retain receipts.
- Have the source diagnosed by the appropriate roofing, electrical, plumbing, HVAC, or water-damage professional.
- Correct the moisture source and dry affected materials promptly rather than painting over or concealing damp material.
Early investigation cannot guarantee a simple repair, but it may limit the extent of damage and clarify what work is actually needed.
Sources and Further Reading
- Moisture warning signs: UGA Mold and Moisture Home Inspection Checklist and EPA Moisture Control Guidance.
- Roof and attic checks: UGA Home Maintenance Checklist, IBHS wind-driven rain research, and ENERGY STAR attic guidance.
- Safety: CDC electrical hazard guidance, ENERGY STAR DIY attic checks, and OSHA fall-prevention guidance.
- Insurance and hiring: NAIC Consumer’s Guide to Home Insurance, Texas Department of Insurance disaster-claims FAQ, and FTC contractor guidance.
- Inspection tools and drying: Building diagnostic test protocols and the EPA guide to mold and moisture.

The HProb Home Editorial Team creates practical educational guides about home maintenance, plumbing, HVAC, roofing, moisture control, leak prevention, and homeowner safety. Our articles are prepared using manufacturer documentation, public safety guidance, building-code references, and reputable home-maintenance resources. HProb does not provide engineering evaluations, contractor services, or property-specific repair instructions. Electrical, gas, structural, refrigerant, roofing, and major plumbing work should be handled by appropriately qualified professionals when required.